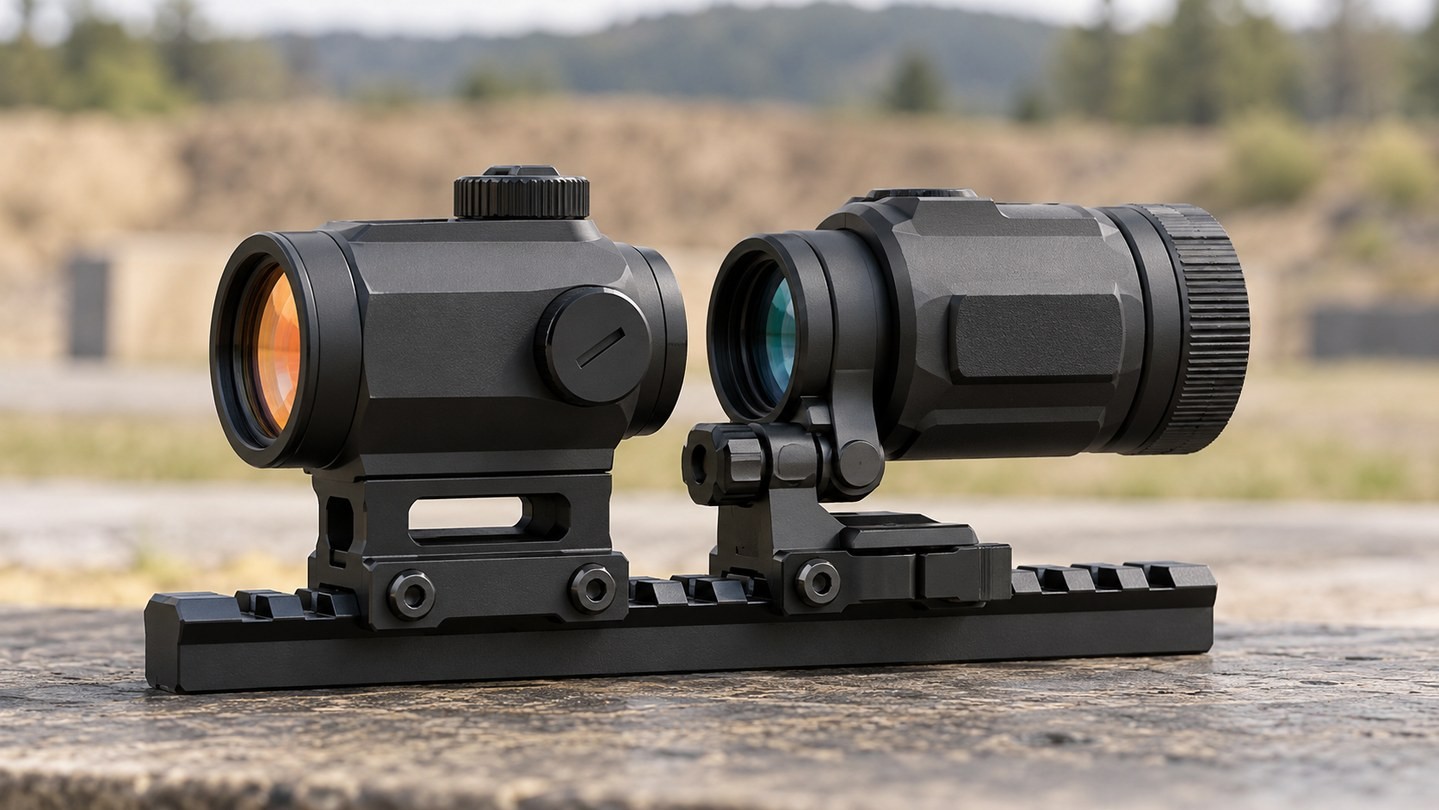
You mount a magnifier behind a red dot, flip it into place and expect a clean 3x view. Instead, the image looks clipped, a dark crescent appears at one edge, or your head has to move to an awkward position before the full picture appears.
The first suspect is often the magnifier itself. In many cases, though, the real problem is simpler: the red dot and magnifier are not sitting at compatible optical heights.
Matching the two does not mean their housings must look level. It means the optical center of the red dot must fall close enough to the center of the magnifier for the complete system to work as intended.
What “matching height” actually means
Mount height is normally measured from the top of the rail to the optic’s optical centerline. That centerline passes through the useful viewing axis, not necessarily through the visual middle of the housing.
This distinction matters because two devices can look similar from the side while their optical centers sit at different heights. One mount may place the red dot low over the rail, while the magnifier mount uses a spacer intended for a taller setup. The reverse can happen too.
When comparing parts, look for the documented optical-center height or a clearly stated compatibility configuration. Do not compare the height of the mount body, the bottom of the lens or the outside diameter of the housing.
Absolute and lower-one-third are useful shorthand—not universal dimensions
Many red-dot and magnifier systems are described as absolute co-witness or lower-one-third height. Those labels are useful when the manufacturer defines them for a specific sight, mount and platform. They are not a guarantee that every product carrying the same label has an identical centerline.
For example, official magnifier systems may include a spacer so the same magnifier can be configured for two common heights. Other systems offer several spacer options or separate mount models. That is evidence that the label alone is not enough: the hardware configuration still matters.
Our guide to absolute vs lower-one-third co-witness explains what those sight pictures mean. For magnifier pairing, use the actual mount specifications whenever they are available.
What a height mismatch looks like
A magnifier has a defined optical path and a finite viewing window. If the incoming line of sight is too far above or below its intended axis, you may notice:
- a dark edge or crescent that remains even when eye relief feels correct;
- a picture that becomes complete only after you raise or lower your head;
- unusually limited adjustment when trying to center the dot;
- a full view with the magnifier flipped away but a clipped view when it is engaged;
- difficulty getting the same cheek position in magnified and unmagnified use.
These symptoms do not prove a height mismatch by themselves. Incorrect eye relief, a loose mount or a poorly set diopter can create similar frustration. Start by checking the mechanical configuration, then separate height, eye position and focus instead of adjusting everything at once.
The magnifier eye-relief and eye-box guide explains how fore-and-aft position differs from optical height.
What the supplied spacer does
A spacer raises the magnifier mount by a fixed amount so its centerline better matches a taller red-dot mount. Some magnifiers arrive with the spacer installed; others include it loose; still others require a different mount.
Use the spacer only in a configuration supported by the manufacturer. The correct setup may require longer screws supplied for that spacer. Reusing short screws with an added plate can reduce thread engagement, while using screws that are too long can interfere with the mount or bottom out before the assembly is secure.
Avoid stacking improvised washers or unrelated plates to chase a visual match. A spacer is part of a load-bearing mounting system, not a cosmetic shim. Follow the exact hardware and torque instructions for the chosen optic and mount; there is no universal screw length or torque value for every combination.
Do the magnifier’s windage and elevation adjustments fix the height?
Magnifier windage and elevation controls are usually there to center the red dot within the magnified image. They do not zero the primary red-dot sight, and they should not be used as a substitute for a badly mismatched mount height.
Small optical alignment corrections are normal. If you must drive an adjustment close to its limit just to obtain a usable picture, stop and recheck the spacer, mount model and centerline specifications. Mechanical height should be corrected mechanically before the internal centering controls are fine-tuned.
After installation, zero and confirm the red dot as the primary sight. Then use the magnifier adjustments only to place the dot comfortably within the magnified field. Our flip-to-side magnifier alignment guide covers that sequence in more detail.
Can you mix red-dot and magnifier brands?
Often, yes—but brand compatibility is not the same as guaranteed fit.
A mixed system still needs:
- compatible optical-center heights;
- a magnifier mount that fits the magnifier’s own interface;
- enough rail space for both devices;
- usable eye relief in your normal position;
- a folding direction that clears controls and other equipment;
- secure mounting hardware specified for each component.
Staying within one product family can make the height question easier because the manufacturer may publish the intended combination. Mixing brands can work equally well when the dimensions and interfaces are verified rather than assumed.
Mounting footprint is a separate issue from optical height. A familiar-looking base is not proof of compatibility; check the red-dot footprint guide before choosing adapters or replacement mounts.
A reliable setup order
Use a sequence that isolates one variable at a time:
- Confirm the red dot’s documented optical-center height with its installed mount or riser.
- Configure the magnifier mount for the matching height using the correct manufacturer-supplied spacer and screws.
- Place the red dot and magnifier on compatible rail sections without bridging separate moving surfaces.
- Position the magnifier fore and aft until its eye relief works with your natural viewing position.
- Tighten each mounting interface according to its own instructions; do not borrow a torque value from another product.
- Set the magnifier diopter so the dot and scene appear immediately clear.
- Use the magnifier’s centering adjustments for a comfortable composition, not to compensate for gross height error.
- Flip the magnifier in and out several times and confirm that your normal head position works in both states.
If the picture still shifts or disappears after the heights match, inspect mount play, hinge lockup and eye position before assuming the optics are defective.
What to check before buying
The safest time to solve height compatibility is before ordering the second component. Record the exact red-dot model, mount and spacer already in use, then compare them with the magnifier manufacturer’s supported center heights.
Ask five practical questions:
- What is the red dot’s optical-center height above the rail?
- Which heights can the magnifier mount support?
- Is the necessary spacer included, optional or unavailable?
- Does the spacer require its own screws or mount interface?
- Will the resulting position still provide usable eye relief and rail space?
A red dot and magnifier should be treated as one optical system even when they come from different brands. Match the centerlines first, establish eye relief second and make small centering adjustments last. That order solves the mechanical problem before you try to tune the view.
To compare complete systems, browse Red Dot Sights, Magnifiers, or read our magnifier vs LPVO guide.

















Leave a comment