Have you ever focused a scope on one object and noticed that something closer—or farther away—looked soft even though you had not touched the controls? That is a depth-of-field effect.
Depth of field sounds simple: it is the range of distances that looks acceptably sharp around the distance of best focus. The important word is acceptably. A scope does not create a hard wall where everything on one side is sharp and everything on the other side is blurred. Sharpness falls away gradually, and the amount you notice depends on the detail you are trying to see, the magnification, the focus setting, the light and the complete optical design.
What depth of field means in a rifle scope
When a scope is focused at a particular distance, objects at that distance form the sharpest target image. Objects somewhat nearer or farther away may still look clear enough because the blur is too small to be distracting. The span that remains acceptably sharp is the depth of field.
This is an object-space idea: it describes how much of the scene can look reasonably sharp without refocusing. It is not the same as depth of focus, which refers to tolerance around the image plane inside an optical system.
There is no single universal depth-of-field number for a scope. A result only makes sense if “sharp enough” is defined. Large, high-contrast shapes can remain recognizable over a wider range than fine lines or low-contrast detail.
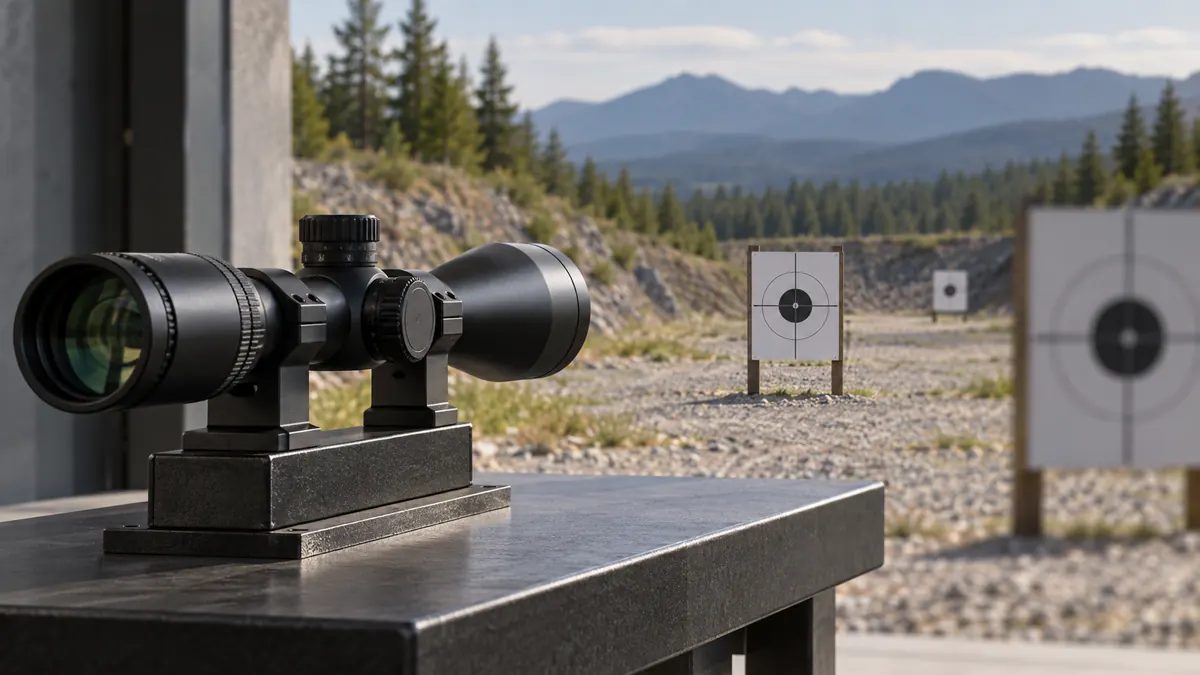
Illustration: the middle distance is the plane of best focus; nearer and farther planes soften progressively. This is a generic educational scene, not a test result for a specific scope.
Best focus is a plane, not an unlimited zone
Imagine three signs placed at near, middle and far distances. If the middle sign is brought into the best focus, the near and far signs may still be usable, but they will not contain exactly the same fine detail. Move far enough away from the chosen focus distance and the softness becomes obvious.
That transition is gradual. This is why two people can look through the same scope and disagree about its depth of field. One person may be judging bold outlines while the other is looking for small texture or lettering.
Ambient light and the observer’s pupil can also change the experience. Your eye is part of the viewing system, so a comparison made in bright daylight may not feel identical in dim conditions.
Why higher magnification often looks less forgiving
As magnification increases, small focus errors become easier to see. The image is enlarged, but so is the visible blur. The field of view also becomes narrower, and the nominal exit pupil usually becomes smaller. Together, those changes can make high power feel more demanding.
That does not mean magnification directly creates poor focus. It means the same departure from best focus is easier to notice when you are inspecting a larger image and finer detail.
This is one reason a scene may appear broadly clear at 4× but require a more precise focus setting at 16×. If you are comparing two scopes, use the same distance and the same actual magnification. Comparing one model at 6× with another at 18× tells you very little about their optical design.
Our guide to resolution versus magnification explains the related point that making a feature look larger does not automatically reveal more real detail.
Focus distance changes the usable zone
Depth of field usually feels shallower at close distances and broader as the focus distance moves farther away. That is why close-focus work can reveal small errors that are hard to notice when viewing a distant landscape.
The near and far parts of the acceptable zone are not necessarily equal. Depending on the optical system and the chosen distance, more of the usable range may fall behind the point of best focus than in front of it. Treat “one third in front and two thirds behind” as a photography shortcut, not a fixed law for every scope and every setting.
The practical lesson is simpler: if close objects matter, check the scope at those real distances. An infinity mark or a distant-focus setting cannot tell you how much detail will remain clear nearby.
Objective size is not a depth-of-field score
In a simple camera lens, aperture is a major depth-of-field control. A riflescope is a more complex visual system, and the objective diameter printed in the model name is not an adjustable camera f-stop.
A larger objective can support a larger exit pupil at the same magnification and can change the optical design choices available to the manufacturer. It does not, by itself, prove that one scope has shallower or deeper usable focus than another. Internal apertures, effective objective diameter, focal lengths, zoom position, eyepiece design and the observer’s eye all matter.
This is why “50 mm has less depth of field than 40 mm” is too crude to use as a buying rule. Compare the actual scopes instead. For the size and brightness side of the question, read our guide to 40 mm, 44 mm, 50 mm and 56 mm objectives.
Depth of field is not parallax adjustment
Depth of field and parallax are related to target distance, so they are often mixed together. They are still different questions.
- Depth of field: How far in front of and behind the best-focus distance does target detail remain acceptably sharp?
- Parallax: Does the target image appear to move relative to the reticle when the eye moves off the optical axis?
On a scope with side focus or an adjustable objective, the same control often changes target focus and is calibrated as a parallax-distance control. Turning it can make the image look sharper while also bringing the target image closer to the reticle plane. But a sharp-looking image is not proof that parallax error has been completely removed.
After focusing the target, keep the scope steady and move your eye slightly. If the reticle seems to shift across the target, refine the parallax setting. The markings on the dial are starting references; your eye and the real viewing condition are the final check.
Our parallax, target focus and diopter guide shows how to separate those controls.
The diopter does not focus the landscape
The eyepiece diopter is for making the reticle sharp to your eye. It is not the normal control for moving target focus from a near object to a distant one.
Set the diopter on the reticle first, using a plain background and brief glances so your eye does not simply accommodate around a poor setting. Then leave it alone unless the observer changes. Use the side-focus or adjustable-objective control for the target image when the scope provides one.
If the reticle is sharp but the scene is soft, think about target focus. If the complete view disappears behind a black ring or crescent, think about eye position and eyebox, not depth of field.
Fixed-parallax scopes still have a focus range
A fixed-parallax scope is factory-set for a chosen distance and does not give the user an external target-focus control. That does not mean everything from the muzzle to infinity is equally sharp or parallax-free.
Objects around the design distance may appear acceptably clear over a useful range, especially at moderate magnification. Closer or much farther objects can still soften, and parallax error can exist away from the factory-set distance if the eye moves off-axis.
This is not automatically a flaw. A fixed system can be simple, compact and entirely suitable when its intended distances match the user’s needs. The limitation is that you cannot move the best-focus distance when conditions change.
A practical depth-of-field check
You can make a useful comparison without turning it into a laboratory test.
- Choose three detailed objects at measured or repeatable distances. Printed grids, bark texture or high-contrast signs work better than featureless surfaces.
- Stabilize the optic and follow all applicable safety rules. Never look at the sun through any optic.
- Set the reticle diopter first. Do not use the diopter to chase target sharpness.
- Use the same magnification for every comparison. Start at a moderate setting, then repeat at the highest setting you realistically expect to use.
- Focus on the middle object. Note how much fine detail remains visible in the near and far objects without touching the control.
- Shift best focus to the near object, then the far object. Record how quickly the other planes soften.
- Check parallax separately. A clear image and a parallax-free image are not guaranteed to be the same thing.
- Repeat in similar light. A pupil change or a large contrast change can alter what looks acceptable.
Avoid judging from phone-through-eyepiece photos alone. The phone adds its own focus, exposure and alignment decisions. It can document a setup, but it does not reproduce exactly what a human eye sees.
What beginners should take from the specification sheet
Most product pages do not publish a useful depth-of-field specification. Even if they did, the result would need a stated distance, magnification and sharpness criterion.
Look instead for the controls and ranges that affect how the scope will be used:
- Is parallax fixed or adjustable?
- If adjustable, what is the stated minimum focus/parallax distance?
- What magnification will you actually use most often?
- Is the exit pupil comfortable at that magnification?
- Can you obtain a sharp target image and a stable reticle without fighting your eye position?
The exit-pupil guide helps explain why the view can become less forgiving as power rises, but exit pupil is not a complete depth-of-field measurement either.
The bottom line
Depth of field is the range around the chosen focus distance that remains acceptably sharp. It changes gradually, depends on what detail you are judging and usually becomes more demanding as magnification rises or focus distance becomes shorter.
Do not treat it as another name for parallax, reticle focus or eyebox. Set the diopter for the reticle, focus the target with the appropriate control, check parallax with a small eye movement, and compare real scenes at the distances and magnifications you expect to use.
For more practical explanations before choosing an optic, browse the USEEIN Buying Guides.

















Leave a comment