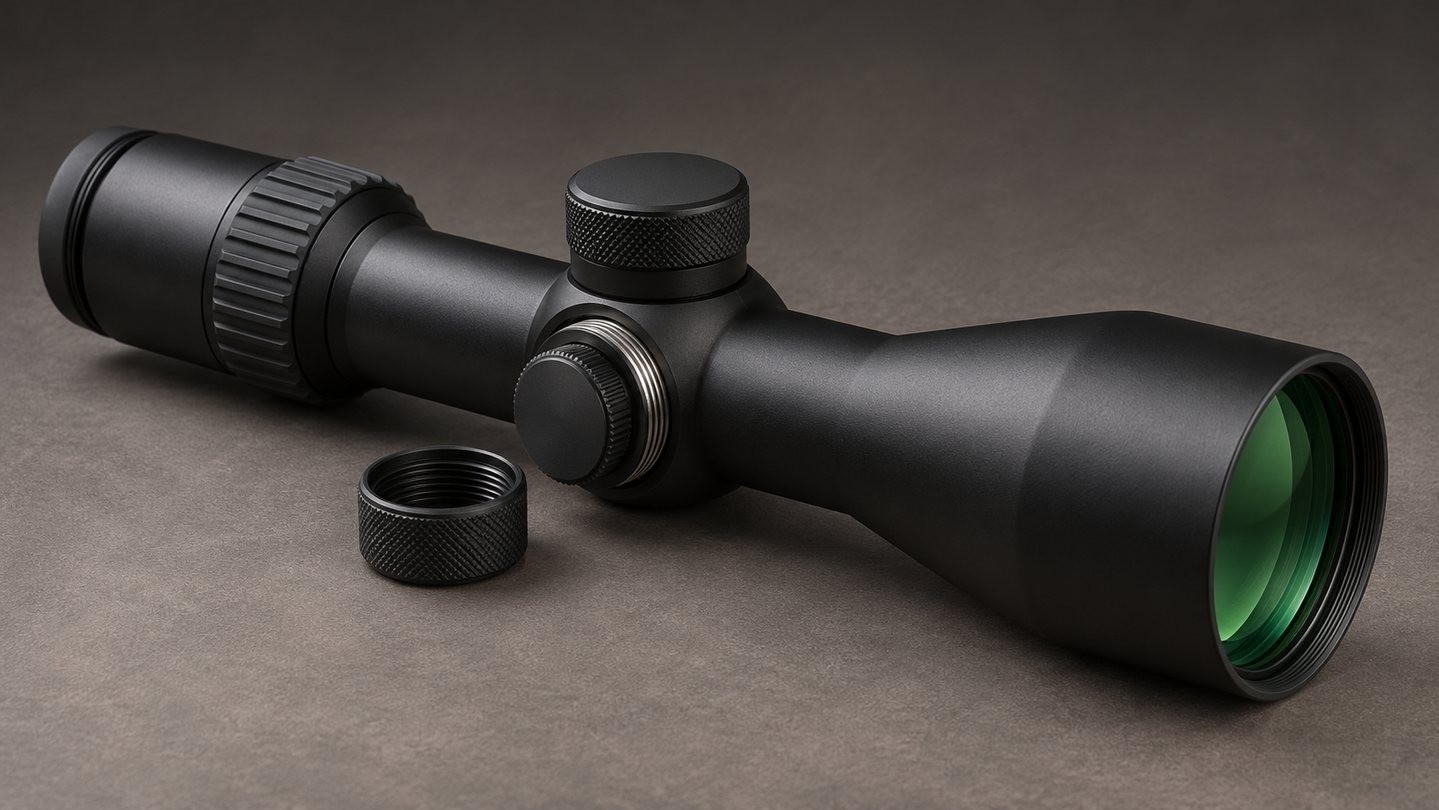
Rifle-scope turret caps look simple, but they perform a practical job: they cover adjustment controls that may otherwise collect dust, dirt, moisture, and accidental contact. A cap should be easy to remove when an adjustment is needed and easy to reinstall when the work is complete.
The details vary by scope. Some caps are only protective covers, some are part of a zero-reset system, and exposed or locking turrets may not use removable outer caps at all. The exact manual therefore takes priority over a generic routine.
What a turret cap actually protects
On a conventional capped turret, the removable cover sits over the windage or elevation adjustment. It helps keep surface contamination away from the dial and reduces the chance that the adjustment will be moved unintentionally during transport or handling.
That is different from a locking exposed turret. A lock controls whether the dial can rotate, while a removable cap physically covers an adjustment. Our guide to capped, exposed, and locking turrets explains the design differences.
A cap is not always the waterproof seal
Do not assume that every scope becomes unsealed as soon as a turret cap is removed. Some manufacturers state that their adjustments remain waterproof without the covers; other products may rely on correctly fitted closures for the protection described in their specifications.
The safe conclusion is model-specific: keep the caps fitted unless you are making an adjustment, and verify the manual before drawing conclusions about weather resistance. The separate guide to waterproof, fogproof, and IP ratings explains why a general label does not replace the product instructions.
Remove the cap over a clean surface
Before opening a capped turret, place the optic in a stable, well-lit area. Brush or blow away loose dry debris around the cap so it does not fall onto the exposed adjustment. Keep the removed cap where it cannot roll away or collect grit.
Turn only the part identified as the protective cover. Do not loosen a center screw, retaining screw, scale ring, or internal component unless the manual specifically includes that step. Similar-looking turret systems can use very different zero-reset mechanisms.
Start the threads gently
When reinstalling a threaded cap, place it squarely over the turret and begin turning with light finger pressure. If the cap tilts, binds immediately, or needs unusual force, stop and start again. A correctly aligned cap should engage smoothly.
Cross-threading can damage the cap, the turret housing, or both. Forcing the cap farther does not improve alignment. If the threads appear damaged or contaminated, leave the cap off in a clean, dry place and contact the manufacturer or seller for model-specific guidance.
Finger-tight normally means finger-tight
Manufacturer instructions for several capped systems specify reinstalling a cover until it is finger-tight and warn against over-tightening. That wording matters. A turret cover is not normally a fastener that benefits from maximum hand force.
Do not use pliers, an improvised lever, or thread-locking compound on a protective cap unless the exact product instructions require it. Tools can mark the finish, deform thin parts, or make the cap difficult to remove later.
Do not add general-purpose oil
Oil can attract dust and may migrate onto surfaces where it was not intended. Many scope adjustments are lubricated internally at the factory and do not need user-applied lubricant.
If a cap feels rough, first inspect for visible dirt, damaged threads, or incorrect alignment. Do not spray solvent or oil into the exposed adjustment. A change in feel may be a service question rather than a cleaning problem.
What to do if a cap is lost
Record the scope manufacturer, exact model, and which cap is missing. Windage and elevation covers may look identical, but replacement parts are not universally interchangeable across models or production generations.
Keep the exposed adjustment clean and dry while you identify the correct replacement. Do not substitute a cap that only appears to fit, because thread diameter, pitch, depth, and sealing details can differ. Manufacturer support may be able to supply user-installable external parts. If useful, follow the optic support-photo checklist so the model and affected area are clear.
When the problem needs service
Stop and request product-specific help if:
- the cap will not start squarely;
- the threads are visibly flattened, chipped, or contaminated with metal fragments;
- the turret housing rotates when only the cap should move;
- the adjustment feels different after an impact;
- the cap is stuck and normal finger pressure will not release it; or
- an internal or integral part appears damaged.
Do not disassemble the turret to solve a cap problem. External user-replaceable parts and internal service parts are not the same thing.
A simple turret-cap routine
- Confirm that the part is a removable protective cap.
- Clear loose exterior debris before opening it.
- Remove it over a clean surface and keep it contained.
- Make only the adjustment described by the product instructions.
- Reinstall the cap squarely with light finger pressure.
- Stop if it binds, tilts, or needs unusual force.
Final takeaway
Turret caps are small protective parts, not universal sealing systems or high-torque fasteners. Keep them clean, start their threads carefully, tighten only as the manufacturer directs, and replace a missing cap with the correct model-specific part. If the cap or turret no longer behaves normally, document the symptom and seek service rather than forcing it.
For a separate explanation of what the clicks should feel like underneath the cover, read the guide to rifle-scope turret click feel.

















Leave a comment