A scope marked 3–15×50 does not normally need a 50 mm slip-on objective cap. The “50” describes the nominal diameter of the objective lens, while a cap must fit around the outside of the objective housing. That housing includes the metal wall, finish and sometimes a raised ring, so its outside diameter is larger.
This small distinction explains many loose caps, caps that will not start, and online orders that look correct until they reach the scope. The solution is to measure the part the cap actually touches.
Start with the correct measurement
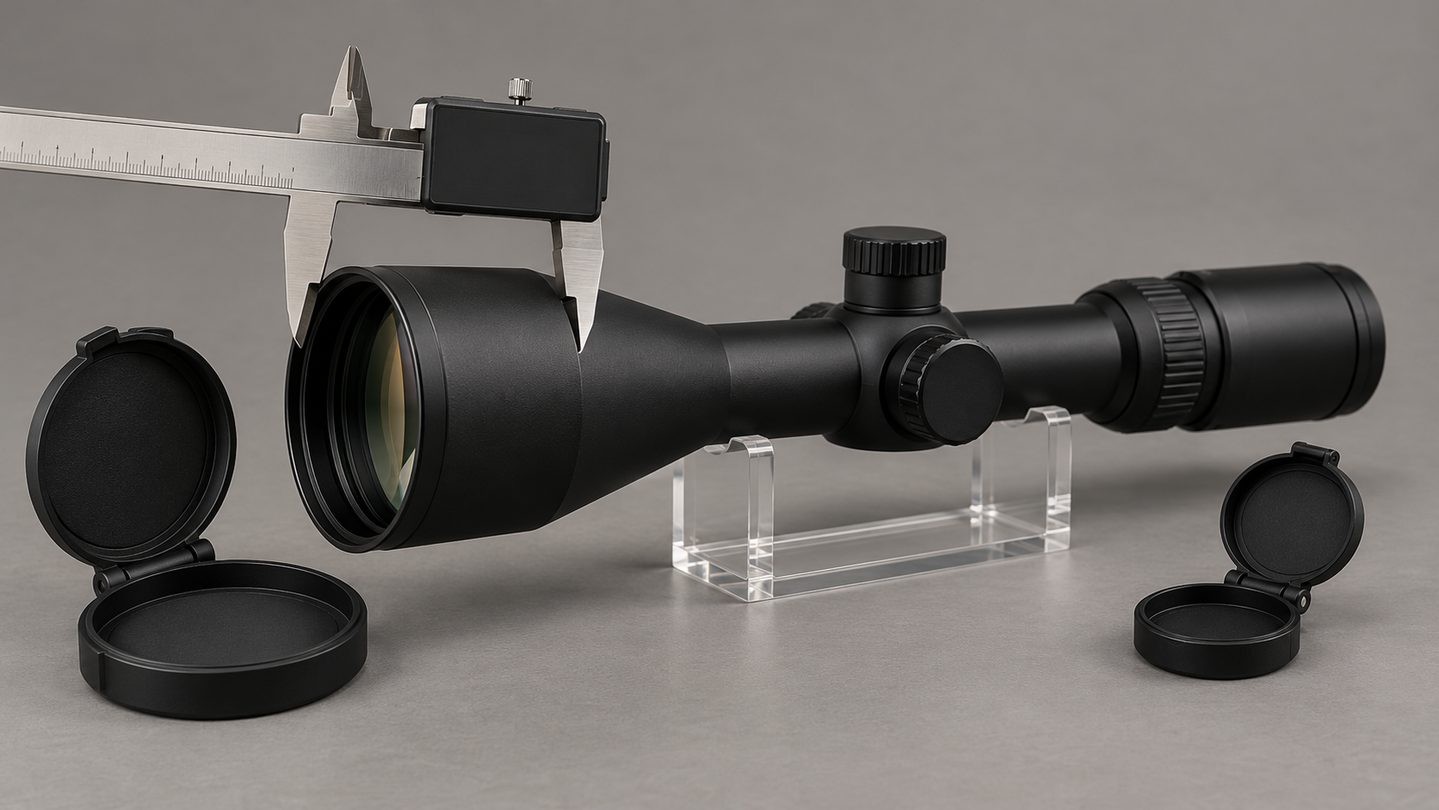
For a slip-on or friction-fit cap, measure the outside diameter of the scope housing at the exact place where the cap will sit. Do not measure the clear glass opening, and do not copy the objective-lens number from the model name.
Butler Creek's official measurement guide tells users to measure the outside edge of the housing at both the eyepiece and objective. It provides separate size tables because the two ends are usually different.
Threaded or model-specific covers are different. Their compatibility may depend on the manufacturer's thread, production generation or exact product family rather than an outside-diameter measurement alone. Leupold, for example, publishes an accessory chart that maps individual scope models to compatible covers and shades.
Why a 50 mm objective is wider than 50 mm outside
The last number in 3–15×50 describes the objective lens diameter. It does not describe:
- the outside diameter of the objective bell;
- the eyepiece diameter;
- the main-tube diameter;
- the thread used for a shade or screw-in cover;
- the size of a protective cap.
The housing has to surround and retain the optical assembly. Its wall, retaining system and external finish add diameter beyond the glass. Two scopes with 50 mm objective lenses can therefore have different outside bell diameters and require different caps.
Our guide to what rifle-scope numbers mean explains the model label in more detail. The article on the ocular and objective ends also separates lens names from the outside dimensions of the housing.
The best tool is a caliper
A caliper gives the most direct measurement. Close the jaws gently around the outside of the housing where the cap's sleeve will grip. Keep the jaws square to the tube so you measure a diameter rather than a diagonal.
Use light contact. The jaws only need to touch the surface; squeezing harder can mark the finish and will not produce a better result. Read the value in millimetres or inches, then compare it with the cap maker's current size chart.
Measure twice and record which end you checked. A note such as “objective: 58.7 mm outside” is much more useful than “50 mm scope.”
How to measure without a caliper
A ruler can work when the cap sizing increments are generous, but it is easier to introduce error. Butler Creek's guide suggests standing the scope end on paper, marking the outside edges and measuring the distance between the marks.
- Protect the lens and finish from the work surface.
- Keep the housing perpendicular to the paper.
- Mark the widest outside edges, not the glass.
- Measure between the inside faces of the marks.
- Repeat the measurement before choosing a size.
A flexible tape wrapped around the circumference is less direct because you must convert circumference to diameter, and a loose or angled wrap can add error. Use a caliper or the paper-and-ruler method when possible.
Measure the exact seating area
Do not assume every part of the objective bell has the same diameter. Decorative steps, lock rings, knurling and changes in taper can alter the fit. Place the caliper where the cap's flexible sleeve or clamp will actually sit.
The same rule applies at the eyepiece. A fast-focus ring, locking diopter or rubber rim may be wider than the fixed housing behind it. The cap must fit the intended seating surface without blocking a control that still needs to turn.
If the scope already carries a sunshade, anti-reflection device or adapter, decide whether the cap is meant for the bare scope or for that accessory. Measure the final surface that will receive the cap. Our overview of lens caps, sunshades and ARDs explains why these accessories are not interchangeable.
Slip-on, stretch-fit and threaded caps use different rules
- Friction-fit flip caps use the measured outside diameter and a manufacturer's size chart.
- Flexible or stretch-fit caps cover a stated diameter range rather than one exact value.
- Threaded covers require the correct thread and model compatibility.
- Manufacturer-specific magnetic covers may be assigned by scope model, objective size and production generation.
- Neoprene covers are normally selected by the overall scope length and outside profile, not only one end diameter.
This is why a measurement should be matched to the instructions for the exact cap style. A correct number used with the wrong fitting system can still produce the wrong part.
What to do when the measurement falls between sizes
Follow the cap manufacturer's current guidance rather than applying one universal rule. Butler Creek's guide says that when a scope falls between two of its listed sizes, the smaller size may give the better friction fit. That advice belongs to that product system; another brand or a rigid threaded cover may use a different rule.
Also consider temperature and material. A flexible polymer sleeve behaves differently from a precisely machined metal thread. If the chart gives a fit range, stay within it. Do not force a rigid cover onto a housing that is outside the stated range.
Check the fit before relying on the cap
A suitable cap should seat fully and remain secure during normal handling without needing excessive force. Open and close a flip cap several times and confirm that its hinge does not strike a turret, zoom ring or another accessory.
- the cap does not slide off with a light pull;
- the sleeve is not visibly overstretched or split;
- the cover opens without moving the cap body;
- the cap does not rub the lens surface;
- the eyepiece control and objective adjustment still turn normally;
- the added cap does not create a clearance problem.
That final point matters on a closely fitted setup. A few millimetres of cap thickness can consume a gap that looked adequate with the bare housing. See the objective-clearance guide before treating the uncapped diameter as the final installed profile.
A simple ordering checklist
- Record the exact scope brand and model for compatibility lookup.
- Measure the outside diameter at the objective cap seating area.
- Measure the outside diameter at the eyepiece cap seating area.
- Note whether each end is round or has an unusual shape.
- Identify the cap style: friction-fit, flexible, threaded or model-specific.
- Include any sunshade, adapter or control that changes the seating surface.
- Use the manufacturer's matching size or part number.
The key rule is simple: measure the housing the cap will touch, then use the chart for the cap you are buying. The objective number helps describe the optic, but it is not a universal cap size.

















Leave a comment