At first glance, a BDC reticle seems wonderfully simple. Zero the centre, use the next mark for a longer distance, and keep moving down the reticle as the target gets farther away.
That basic idea is correct. The common mistake is assuming that every lower mark always equals a fixed distance—perhaps 200, 300 or 400 yards—regardless of the scope, ammunition or magnification setting. It does not.
BDC stands for bullet drop compensation. The reticle gives you a series of holdover references below the centre aiming point. Those references can save time because you do not have to dial the elevation turret for every distance. But the reticle only becomes useful when you understand what its marks were designed around and how closely your real setup follows those assumptions.
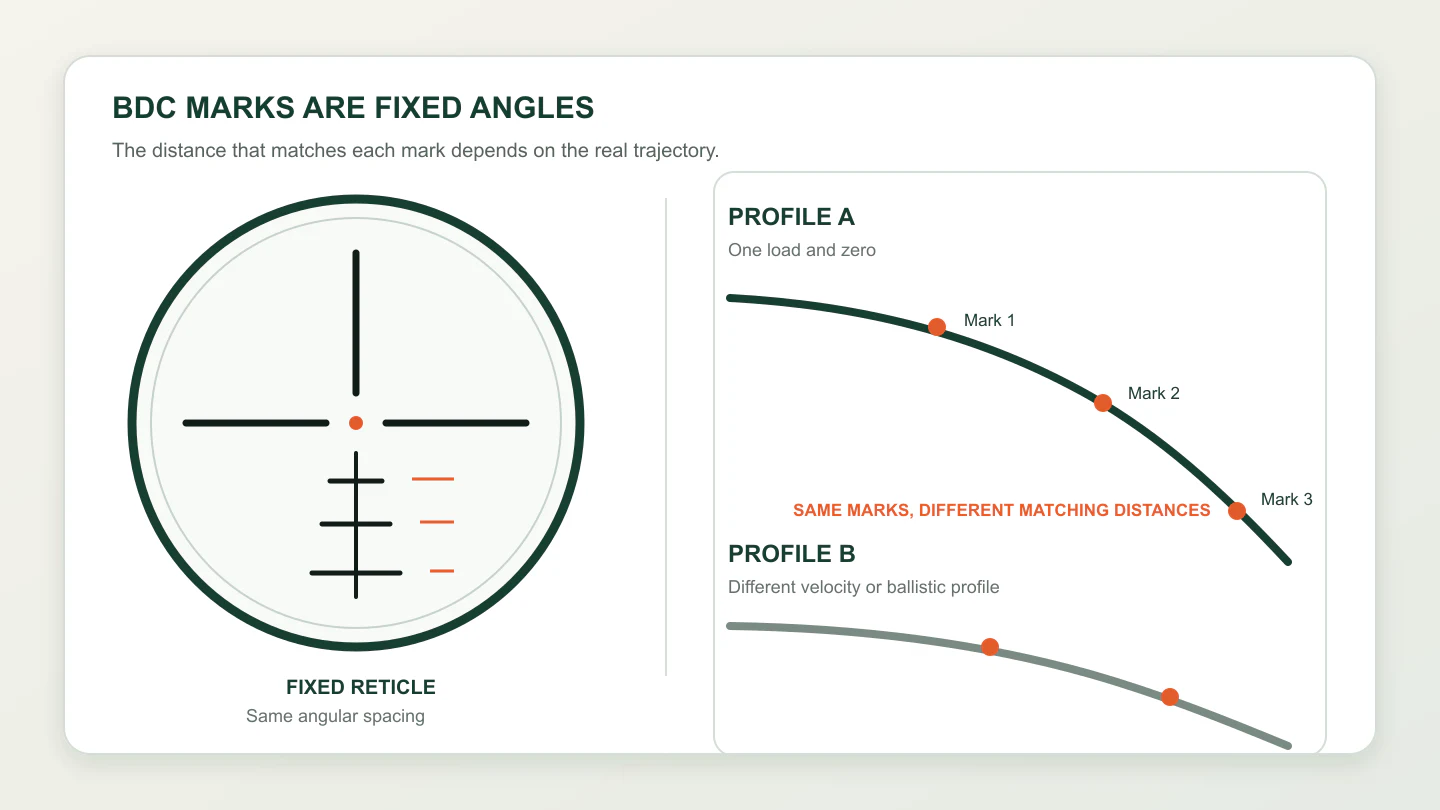
BDC holdover marks are fixed angular references; the real distance matched to each mark changes with the ballistic setup.
What a BDC reticle is actually doing
A projectile follows a curved path rather than travelling in a perfectly straight line. After the optic has been zeroed, the centre of the reticle represents one chosen point in that trajectory. The marks below the centre provide additional aiming references for increasing amounts of drop.
Some BDC designs use dots. Others use short horizontal bars, circles, chevrons or a compact tree. The artwork may look different, but the principle is the same: each mark represents a particular angular offset below the centre.
That last point matters. The mark is physically an angle inside the optic. A manufacturer may translate that angle into an estimated distance for a selected ballistic profile, but the reticle itself does not know what ammunition is being used or how fast it is travelling.
Why “the second mark equals 300 yards” may be wrong
A published BDC chart is normally based on a set of assumptions. Change one of them and the distance that matches a mark can change as well.
The main variables include:
- the zero distance;
- projectile velocity;
- ballistic coefficient and projectile shape;
- sight height above the bore;
- atmospheric conditions;
- the actual angular spacing of the reticle marks; and
- on many second focal plane scopes, the magnification setting.
This is why two cartridges with similar names can still produce different results. It is also why a shorter barrel, a different load or a large change in elevation above sea level may shift the best match for a particular hold point.
Manufacturers often publish a recommended zero and a representative load for a BDC design. Treat that information as a starting model, not a promise that every setup will land at the labelled distance.
FFP and SFP change how the marks behave
Focal plane is one of the most important checks on a variable-power BDC scope.
In a first focal plane (FFP) scope, the reticle grows and shrinks with the target image. Its angular measurements remain consistent across the magnification range. If a lower mark represents a given angular hold, that relationship stays the same when magnification changes.
In a second focal plane (SFP) scope, the reticle appears to remain the same size while the target image changes. The holdover marks are therefore calibrated at one specified magnification—often, but not always, the highest power. At another magnification, the marks may still be usable, but they no longer represent the same angular values unless the manual provides an alternative calculation.
Never assume the correct power setting from the reticle’s appearance. Check the manual for the exact model. Our FFP vs SFP guide explains why the two designs behave differently.
BDC is not the same thing as MOA or MRAD
BDC, MOA and MRAD are sometimes presented as competing reticle types, but they describe different ideas.
A traditional BDC reticle gives you a small number of prearranged hold points associated with an intended trajectory. It is quick to read and usually keeps the sight picture relatively clean.
An MOA or MRAD reticle is an angular ruler. Its marks are spaced in known units, so the user can apply measured corrections from ballistic data rather than relying on preset distance labels. This is more flexible across different loads, but it asks the user to understand the unit and keep suitable data.
Some modern reticles combine both approaches. They may provide a visually simple BDC-style layout while also publishing the MOA or MRAD value of every mark. In that case, the printed distance labels are only one way to use the design; the angular subtensions are the more portable information.
If the unit terminology is unfamiliar, read MOA vs MRAD: Which Adjustment System Is Easier to Use? before comparing the reticles.
A practical way to interpret a BDC chart
Begin with the manufacturer’s reticle manual, not a generic chart found for a similar-looking pattern. Record four things:
- the recommended centre zero;
- the load or trajectory family used for the example;
- the magnification at which the marks are calibrated; and
- the angular value of each mark, if supplied.
Next, compare those assumptions with the actual setup. A ballistic calculator can help estimate where the marks may line up, but it is still a model. Use it to prepare a sensible test plan rather than to replace real confirmation.
Finally, verify the relevant hold points under controlled, lawful range conditions. Record the actual distance that works for each mark instead of forcing the setup to match a convenient round number. One mark might correspond closely to 300 yards while another fits better at 385 than 400. That is not a failure of the reticle; it is simply the real trajectory being mapped onto fixed angular references.
Always follow local laws and range rules, keep the firearm unloaded during setup and inspection, and use a qualified instructor or range professional if the zeroing process is unfamiliar.
When a BDC reticle is a good choice
A BDC reticle makes sense when:
- you prefer a clean sight picture with only a few holdover references;
- you use a reasonably consistent setup and ammunition choice;
- you want faster holds without dialing the elevation turret each time; and
- the manufacturer provides a clear reticle manual or subtension chart.
For many beginners, that is an appealing balance. There is less visual information to process than in a dense tree-style reticle, yet more guidance than a plain duplex crosshair provides.
When another reticle may suit you better
A measured MOA or MRAD reticle may be the better choice if you regularly switch between substantially different loads, want to use detailed ballistic data, or prefer corrections expressed in angular units.
A simple duplex may be better if nearly all use is near the zero distance and extra marks would only add clutter. At the other extreme, a full tree-style reticle may be useful when combined elevation and wind holds are a routine requirement.
The broader guide to common rifle scope reticle types shows how these design families fit together.
Five questions to ask before buying a BDC scope
Before choosing one, look beyond the reticle name and ask:
- Is the reticle FFP or SFP?
- At what magnification are the marks valid?
- What centre zero and ballistic assumptions does the manual use?
- Are the mark subtensions published in MOA or MRAD?
- Will the reticle remain visible and uncluttered at the magnifications you actually use?
If a listing shows attractive distance labels but provides no manual, no focal-plane information and no subtension data, there is not enough information to judge how useful those marks will be.
The practical takeaway
A BDC reticle is best understood as a shortcut built from fixed angular references. It can be fast, clean and beginner-friendly, but it is not a universal ballistic computer.
Start with the correct manual, confirm the focal plane and calibration magnification, compare the intended trajectory with your setup, and verify the marks before relying on them. Once that work is done, the reticle stops being a row of optimistic distance labels and becomes a practical map you actually understand.
For more beginner-friendly comparisons, visit the Sporting Optics category or continue with the USEEIN Buying Guides.


















Leave a comment