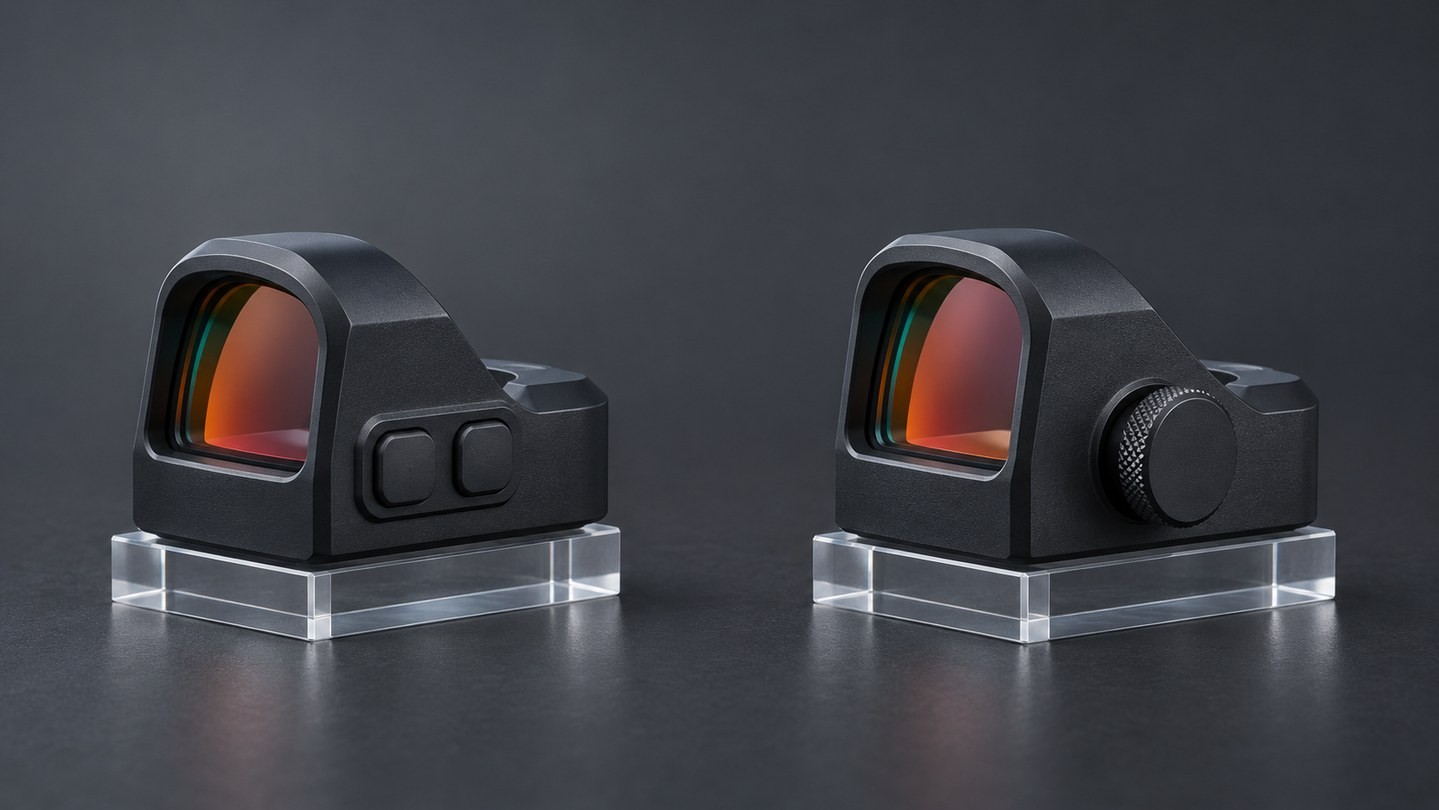
Two red dot sights can offer similar brightness ranges yet feel very different in daily use. One may use two push buttons, while another uses a rotary dial with marked positions. The control style affects how you change intensity, confirm that the sight is off, avoid accidental input and operate the sight by touch. It does not, by itself, prove anything about optical quality, durability or battery life.
This guide compares the practical differences without assuming that every button-controlled or dial-controlled sight behaves the same. Always check the manual for the exact model before relying on a remembered button sequence or dial position.
Start with the control logic, not the shape
A rotary dial usually presents a physical sequence of positions. Depending on the model, those positions may include one off position, several off positions between intensity levels, daylight levels and night-vision-compatible levels. A button system usually changes settings electronically, often with separate increase and decrease buttons.
That broad distinction is useful, but it is only a starting point. Some button sights add automatic brightness, lockout, motion activation or a stored last setting. Some dials combine battery access with the control assembly. The operating manual is therefore more important than the appearance of the control.
Rotary dials provide visible physical position
A dial can provide a direct visual and tactile reference. If the housing has clear index marks, you may be able to see whether it is at an off position, a low level or a brighter level before looking through the window. A dial also tends to stop at defined detents, which can make one-step changes easy to count.
The trade-off is that the dial may require more turning to move from one end of the range to the other. A stiff dial can be deliberate, helping it resist accidental movement, but it may be less convenient with cold fingers or thick gloves. A very exposed dial can also be easier to contact during storage. These are model-specific ergonomic questions, not universal faults.
Buttons can offer more electronic functions
Buttons allow a compact housing to support several commands without a large mechanical selector. A short press may change brightness, a long press may enter another mode, and two buttons together may power the sight down. Official button-controlled designs also show that the same controls can manage manual and automatic brightness or lock the buttons.
The advantage is flexibility. The disadvantage is that the same hardware may perform different actions depending on press duration or current mode. If you cannot remember the sequence, do not experiment by holding buttons at random. Check the instructions and confirm whether the sight is in manual, automatic or locked operation. Our guide to manual versus automatic red dot brightness explains that separate choice.
Off positions deserve special attention
A dial may have a dedicated off position, or it may place off detents between active settings. A button sight may power down after a long press, a simultaneous press or an inactivity timer. Some models return to a default mode after a specified period, while others remember the last manual level.
Never infer that a dark dot means the sight has been intentionally switched off. The battery may be depleted, installed incorrectly or making poor contact, and a very low setting may be difficult to see in bright surroundings. Learn the model’s positive off indication and storage procedure. If battery access is also part of the decision, compare the layouts in our red dot battery-access guide.
Think about operation with gloves and limited visibility
Controls should be evaluated in the conditions in which they will actually be adjusted. Small, flush buttons can reduce accidental presses but may be difficult to distinguish through heavy gloves. Raised buttons may be easier to find but more exposed. A dial with strong detents can be counted by feel, although its direction and starting position still need to be learned.
Try the control with the sight resting safely on a table, not attached to any firearm, and without looking through it. Confirm that you can identify the increase and decrease directions or the dial’s rotation. This simple check is about interface familiarity, not speed. Do not use gloves or pressure that prevent you from feeling whether the control has actually moved.
Accidental changes depend on more than buttons versus dial
A recessed control panel, protective shoulders, firm detents and a button-lock function can all reduce unintended changes. Storage cases and covers also matter. A control that works well in open handling may still be pressed by a tight foam insert or rotated by contact with another item in a bag.
Before long storage, inspect how the case contacts the sight and follow the maker’s power-down instructions. Do not assume that motion activation is equivalent to a physical off position. Motion activation, auto-off and always-on designs manage power differently, as explained in our red dot power-mode comparison.
Mode memory can change the startup experience
Some electronic controls resume at the last selected level. Others start in automatic mode, return to a preset level or change mode after a time limit. A mechanical-looking dial may seem more predictable because its physical position remains visible, but even dial-controlled sights can have model-specific night-vision and daylight ranges.
When comparing products, ask three precise questions: What setting appears after power-up? Does the sight remember a manual level? What happens after the stated timeout? These answers are more useful than a general claim that one interface is “faster.” They also prevent battery-life estimates from being applied to the wrong setting. See our guide to reading red dot battery-life claims for the conditions behind published runtime figures.
Brightness range is separate from control style
Neither buttons nor a dial guarantee a wider usable range. The number of positions, the spacing between them, the lowest visible output and the brightest output all depend on the electronic and optical design. Night-vision-compatible levels are also product-specific and may not be visible to the unaided eye.
Evaluate whether the dot can be set low enough to avoid excessive bloom in dim conditions and bright enough to remain visible in the intended daylight environment. Do not judge the highest setting alone. If the dot appears unexpectedly large, smeared or doubled, first reduce brightness and review the checks in our red dot double-image guide.
Use a short comparison checklist
Before choosing between two models, verify the following in each official manual:
- How brightness is increased and decreased.
- How the sight is powered on and positively powered off.
- Whether manual, automatic, lockout or motion modes are present.
- Whether the last level is remembered after shutdown.
- What happens after a timeout or period of inactivity.
- Whether the controls can be identified with the gloves you normally use.
- Whether the storage case can press or rotate the control.
- Whether battery access interferes with the chosen mount or setup.
If a seller cannot provide the operating instructions, treat that as missing information rather than guessing from product photos.
The practical takeaway
Choose the control system whose exact operating logic you can understand and repeat. A rotary dial can make physical position and one-step changes easy to verify. Buttons can support compact packaging and additional electronic modes. Either can be intuitive or frustrating depending on detents, protection, press sequences, mode memory and storage contact.
The best comparison is therefore not “buttons or dial?” in isolation. It is “Can I reliably set, confirm and store this specific sight under my normal conditions?” Read the manual, test the controls safely on a table and confirm the power behavior before treating the interface as familiar.

















Leave a comment