A scope can look straight from behind the stock and still be slightly rotated in its rings. At short distances, that may be hard to notice. Once you start using larger elevation corrections or the vertical marks in a reticle, however, a small installation error becomes more relevant.
Leveling a scope is not about making the whole setup look tidy on a bench. The goal is to square the reticle's vertical axis to a reliable reference on the mounting system, then keep that relationship from moving while the ring screws are tightened.
What “Level” Means During Installation
People often use the word level for three different things:
- placing the rifle or mounting fixture on a stable, known reference;
- rotating the scope until its reticle is square to that reference; and
- keeping the rifle from canting during actual use.
Those jobs are related, but they are not identical. A perfectly installed scope does not prevent the user from holding the rifle at an angle later. Likewise, a bubble level attached to the scope cannot correct a reticle that was mounted crooked in the first place.
The installation goal is consistency: when the mounting reference is level, the reticle should be plumb. After that, a correctly installed level can help you reproduce the same orientation when it matters.
Why Reticle Cant Matters
The elevation turret and the vertical reticle axis are intended to work in the same direction. If the scope is rotated in the rings, an elevation correction follows that tilted axis instead of moving in a purely vertical direction relative to the rifle.
In practical terms, a larger elevation correction can then include a horizontal component. The same concern applies when you use vertical reticle marks for holds. The error is usually less obvious at modest distances and with small corrections, which is why a slightly crooked scope can seem fine until the setup is used more demandingly.
This does not mean every unexplained horizontal shift is a leveling problem. Wind, inconsistent position, parallax, ammunition and mounting movement can all affect a result. Our guide to scope tracking and return to zero separates adjustment behavior from the other variables that can appear in a test.
Set Eye Relief Before You Chase the Bubble
Do not begin by locking the scope in place and worrying only about the crosshair. First establish a comfortable, repeatable eye position.
With the equipment unloaded and pointed in a safe direction, place the scope in the rings loosely enough that it can still slide and rotate. Follow the optic manufacturer's instructions for setting eye relief, normally checking from your natural position and paying particular attention to the less forgiving end of the magnification range.
Once the full field of view appears without forcing your head forward or backward, note the scope's fore-and-aft position. Rotating the tube during leveling should not quietly undo that work. Our scope ring-height guide explains why clearance, sight height and cheek position need to be considered together.
A Practical Leveling Sequence
There is no single tool arrangement that fits every action, rail, mount and scope. The manufacturer's instructions for the exact components take priority. The sequence below is a useful way to think through the job without treating one fixture or turret cap as a universal reference.
- Stabilize the equipment. Work with unloaded equipment on a steady support where it cannot roll or shift unexpectedly.
- Confirm the mount first. Make sure the base and lower ring or mount assembly are correctly seated before using them as a reference.
- Set eye relief. Establish the scope's fore-and-aft position while the ring tops are still loose.
- Choose a trustworthy reference. Depending on the design, this may be a specified rail surface, mount surface, action flat or a surface identified in the scope or mount instructions.
- Square the reticle. Use a second level, a manufacturer-approved fixture or a known vertical plumb line to rotate the scope until the reticle is aligned with the reference.
- Tighten gradually and evenly. Follow the ring maker's sequence and torque specification while watching for rotation.
- Recheck everything. Confirm reticle alignment, eye relief, ring gaps where applicable and the scope's position before moving on to zeroing.
Avoid borrowing a torque value from another ring design. Screw size, material, thread treatment and clamp construction vary. “Tight enough” by feel is not a specification, but neither is a number taken from an unrelated manual.
The Plumb-Line Check
A known vertical line gives the eye a longer reference than a small bubble alone. With the rifle or fixture held level, rotate the scope until the reticle's vertical stadia is parallel with the plumb line. The two do not have to overlap; they simply need to remain parallel.
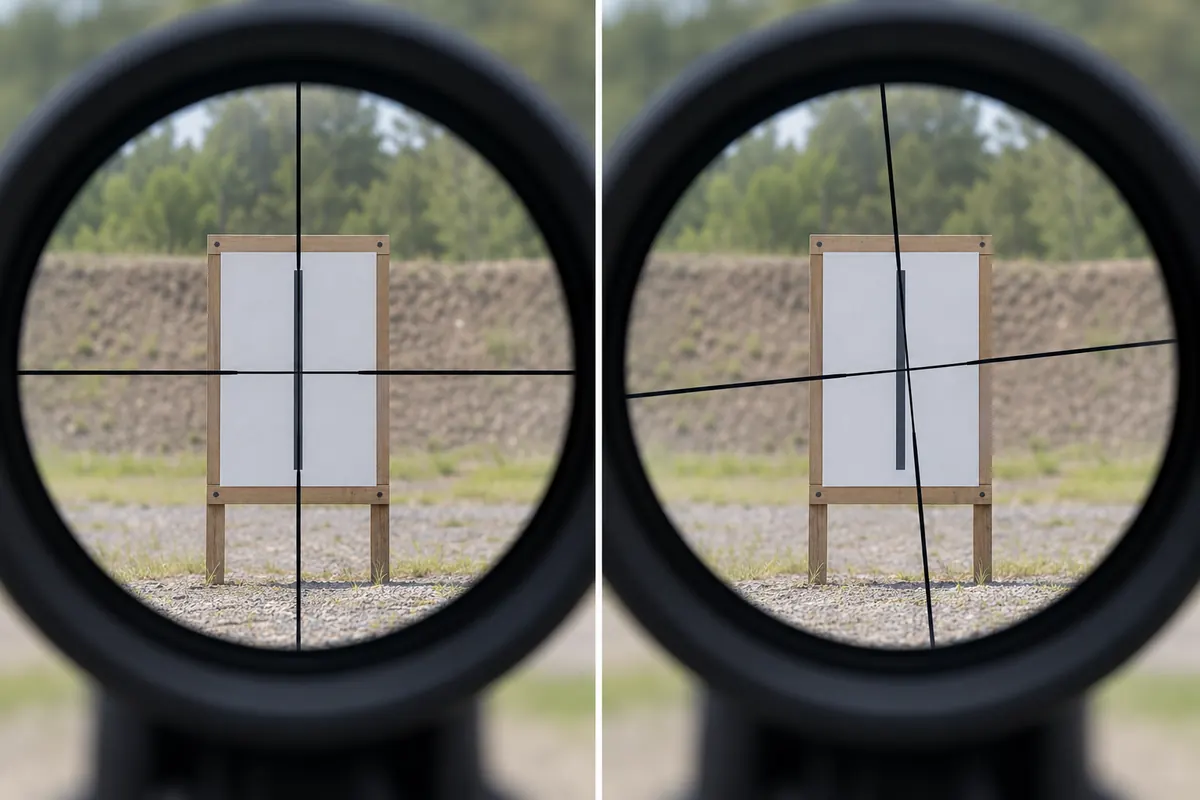
Left: the vertical reticle line is parallel with the plumb reference. Right: the target reference remains vertical while the reticle is rotated. The illustration exaggerates the cant so the difference is easy to see.
Use enough distance that the line is easy to see and the reticle can be compared without straining. Keep parallax and focus under control so apparent movement does not make the comparison confusing. If the manufacturer's instructions specify a different leveling method, use that method.
Do Not Assume Every Flat Surface Is a Reference
A common shortcut is to place a level on the elevation turret cap. That can work on some designs, but it is not automatically reliable. Caps, dial markings and external housings are not guaranteed to be perfectly square to the reticle on every scope.
The same caution applies to a rail or receiver surface. A surface that looks flat may not be the reference the mount or firearm manufacturer intends you to use. When the scope maker identifies a flat on the adjustment saddle, or the mount maker supplies a leveling feature, that documented reference is more useful than a convenient-looking surface chosen by guesswork.
Tightening Is Where Good Alignment Often Moves
The scope can rotate slightly as ring screws begin to clamp the tube. Work in small, even steps and keep checking the reticle rather than waiting until every screw is at final torque.
Watch for uneven ring gaps, a tube that is being pulled sideways and a scope that walks forward or backward. If the parts will not settle evenly, stop and find the cause instead of adding more force. The articles on scope ring alignment and over-tightening and why optic mounting screws loosen cover those related installation problems in more detail.
After tightening, repeat the plumb-line check and confirm that your eye relief is still comfortable. Then zero the scope normally. Leveling establishes the relationship between the reticle and the mount; it does not replace live confirmation of the zero.
What an Add-On Bubble Level Can and Cannot Do
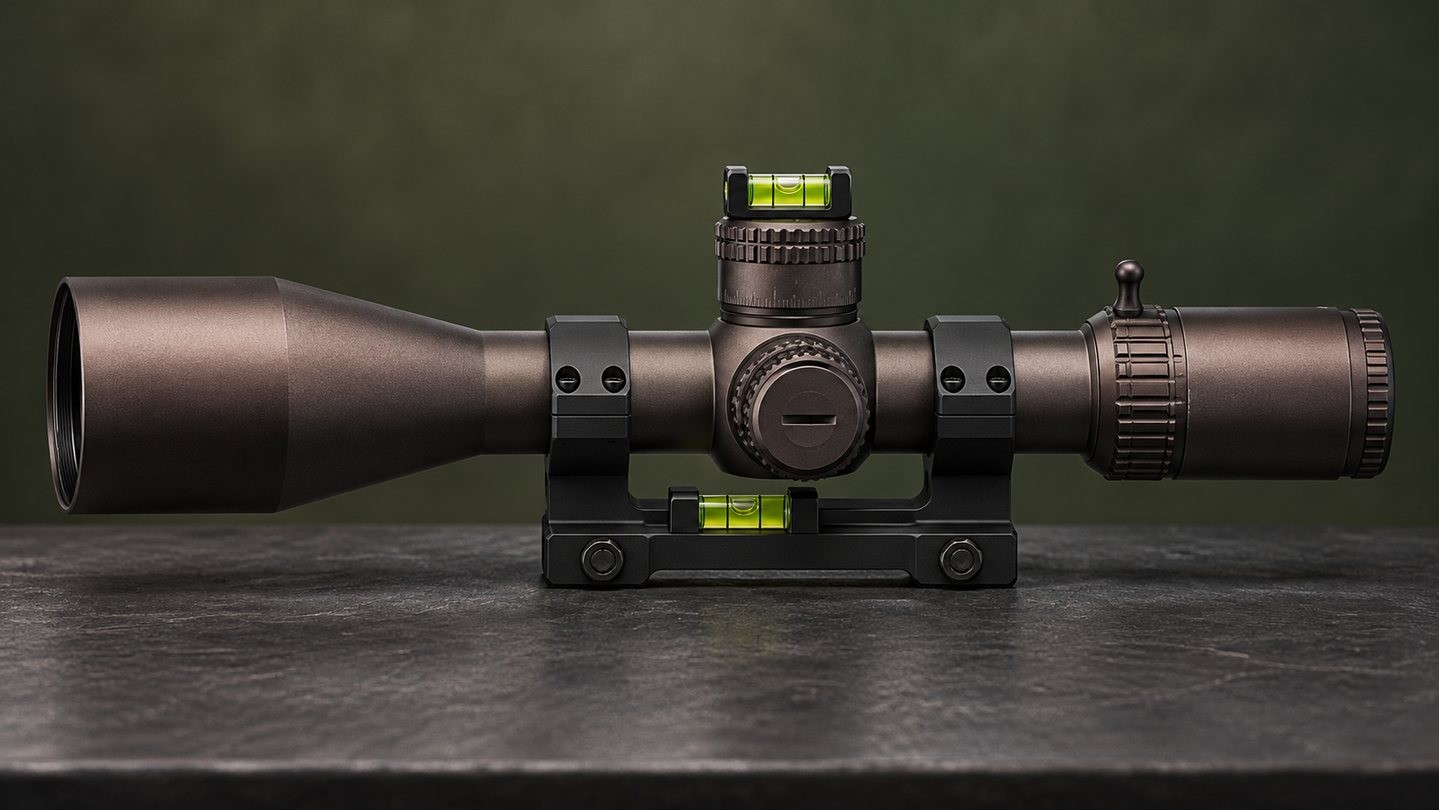
A scope-mounted level is a repeatability aid. Once installed and indexed to a correctly mounted optic, it can help show whether the rifle is being held in the same rotational position from shot to shot.
It cannot tell you that the reticle was installed correctly unless the level itself was indexed during setup. It also does not prove the rail, action and bore are all geometrically perfect. Think of it as a reference for consistent use, not a repair for an unknown installation.
Common Mistakes Worth Avoiding
- Leveling the scope before establishing eye relief.
- Trusting a turret cap without checking whether it is a documented reference.
- Tightening one ring screw to final torque while the others remain loose.
- Correcting resistance or uneven gaps with extra force.
- Assuming a reticle that looks vertical to your shoulder must be mechanically square.
- Treating a bench-level setup as proof that the rifle will never be canted in use.
If your natural position makes a mechanically plumb reticle look persistently crooked, check stock fit, cheek support, shoulder position and whether the equipment is sitting squarely. If the mounting surfaces or ring alignment are uncertain, a qualified installer with the correct fixtures is a better choice than forcing the tube into place.
The Practical Answer
Set eye relief first, level the mounting reference, align the reticle to a trustworthy vertical reference and tighten the rings gradually while watching for movement. Then check the result again before zeroing.
That process will not eliminate every source of horizontal error, but it removes one avoidable variable—and it gives any bubble level or reticle hold a sound reference to work from.
Explore more setup guides
Browse practical explanations of scope mounting, adjustment, eye position and optical performance.

















Leave a comment