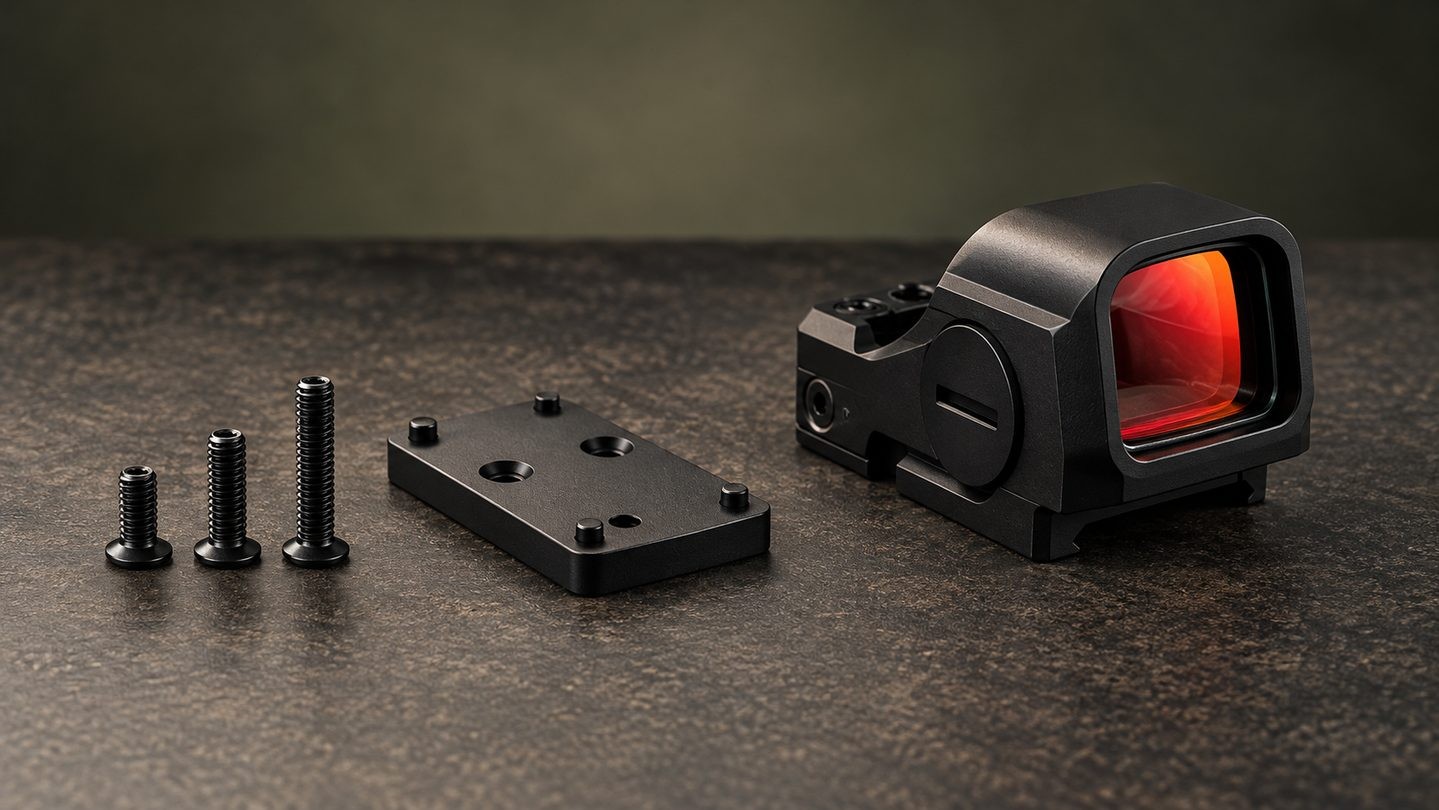
A red dot can match the mounting footprint and still arrive with more than one set of screws. That is not necessarily duplicate hardware. Different mounts, adapter plates and interface thicknesses can require different screw lengths, head profiles or thread specifications.
The important lesson is simple: a screw that starts threading is not automatically the correct screw. The optic, mounting interface and hardware must be treated as one system.
Screw length is only one part of compatibility
When people compare mounting screws, length is the most visible difference. It is not the only one that matters. A correct fastener also needs the specified:
- thread diameter and pitch;
- head shape and seating profile;
- length measured in the way the manufacturer defines it;
- material or strength specification when stated;
- washer, plate or spacer arrangement;
- installation torque and thread-locking instruction.
Two screws can look nearly identical but use different threads. Conversely, two screws with the same thread can have different lengths because one setup includes an adapter plate or spacer.
Why a screw can be too long
A screw that is too long may reach the bottom of a threaded hole before the optic or mount is fully clamped. The fastener can feel tight even though a small gap remains at the interface.
Depending on the design, excessive length may also contact a component below the mounting surface. That is why a visual fit check and the exact manufacturer instructions matter more than simply tightening until resistance is felt.
Warning signs include:
- the optic or plate does not sit flat;
- one side lifts as the screws are tightened;
- the screw becomes firm before the interface closes;
- the supplied plate or spacer has been removed but the longer screw set is still being used;
- the screw head does not seat correctly in the optic.
If any of these appear, stop. Do not use extra force to make the parts close.
Why a screw can be too short
A screw that is too short may engage only a small number of threads. It can appear secure during a quick hand check but provide less engagement than the manufacturer intended.
Short hardware can also become the wrong choice after a spacer, sealing plate or adapter is added. Each additional layer changes the distance the screw must pass through before reaching the threaded interface.
Do not judge engagement by the visible screw head alone. Follow the optic and mount instructions, or ask the manufacturer or seller to confirm the correct hardware combination.
Plates and spacers change the required stack
An optic may mount directly to one interface but require an adapter plate on another. Some products also use a sealing plate, shim or height spacer. These parts change the total stack thickness.
This is why a package may include a short and a long screw set. Vortex, for example, notes that some SPARC configurations use longer screws with a co-witness shim and shorter screws without it. Trijicon product documentation likewise lists different screw lengths with some RMR packages, and its RCR mounting guidance assigns specific screw lengths to specific interfaces.
Those examples should not be treated as universal dimensions. They show why the exact model and mounting system must be checked together.
The footprint does not define every screw detail
A mounting footprint describes the general interface pattern, but it does not guarantee that every host, plate and optic uses the same screw length. Adapter thickness, threaded-hole depth and the hardware supplied by the interface manufacturer can still vary.
Start by confirming the red dot footprint, then verify the screw specification separately. A footprint match answers one compatibility question; it does not answer all of them.
Use the hardware assigned to the exact setup
The safest order is:
- Identify the exact optic model.
- Identify the exact mount or adapter plate.
- Confirm whether a sealing plate, shim or spacer is part of the setup.
- Read both manufacturers' current instructions.
- Match the specified thread, head style and length.
- Make sure the interface sits flat before final tightening.
- Follow the specified torque and thread-locker guidance.
Avoid mixing loose screws from different optics just because they appear similar. Keep labeled hardware sets with the product they came with.
Tightness does not prove correct fit
Fastener torque matters, but torque cannot correct the wrong thread or the wrong length. A long screw can bottom out and produce resistance. A short screw can reach the requested torque with less engagement than intended. A mismatched head can tighten against the wrong surface.
For that reason, first establish correct hardware and full seating, then follow the model-specific tightening instruction. Our guide to why optic screws loosen explains other factors such as clean threads, movement at the interface and reinspection. The separate guide on scope mount torque explains why one universal torque value is not appropriate.
What to check before ordering or installation
Before buying replacement hardware or combining an optic with a new mount, record:
- optic brand and exact model;
- footprint or mounting pattern;
- mount or adapter-plate brand and model;
- every plate, shim or spacer in the stack;
- specified screw thread and head style;
- specified screw length and where that length is measured;
- the current manufacturer instructions.
If documentation is unclear, contact the optic or mount manufacturer before installation. For products sold by USEEIN, you can also send the exact model and mounting-interface details to our support team for a compatibility check.
A practical rule to remember
Do not choose a mounting screw because it fits through the hole. Choose it because the optic and mounting-interface instructions identify it for that exact stack.
Correct footprint, correct hardware and full seating come before final tightening. If the interface does not close evenly or the instructions conflict, stop and verify the parts rather than forcing the installation.
Browse Red Dot Sights to compare footprint, housing and mounting information before choosing an optic.

















Leave a comment